


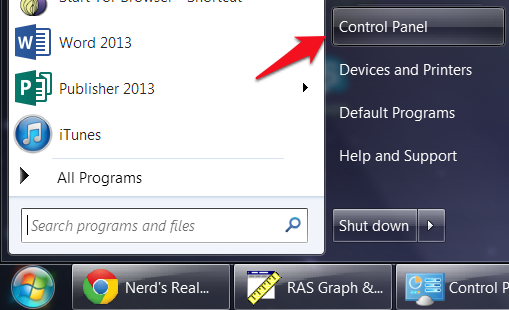
Step 2: Click on the Control Panel menu option.
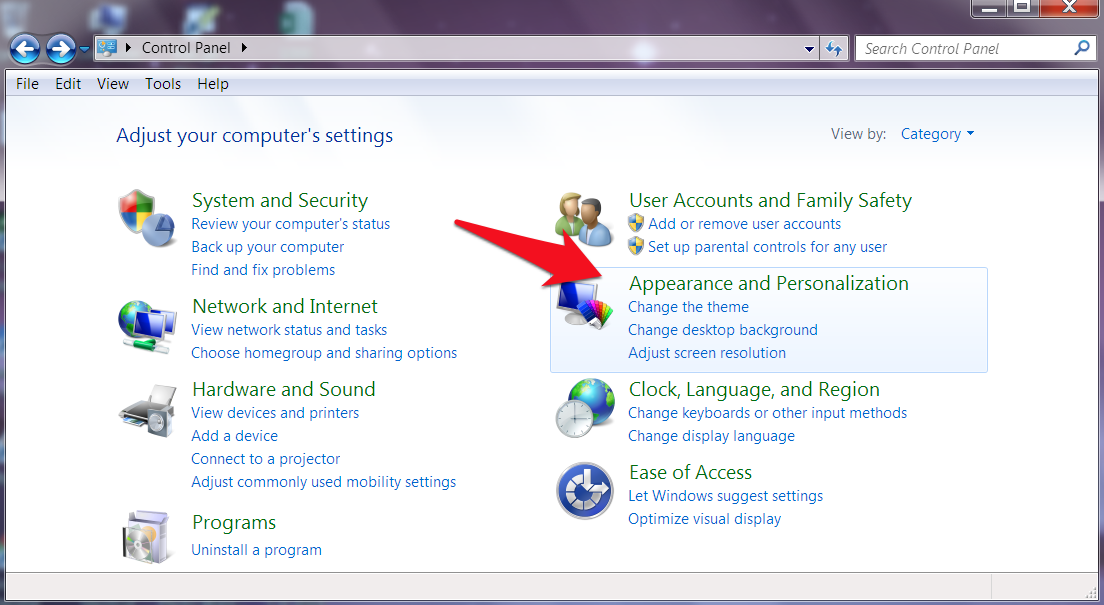
Step 3: Click on the Appearance and Personalization link.
Step 4: Click Folder Options.

Step 5: Choose View tab
Step 6: Now click on the Show hidden files and folders option as shown by the red arrow
Step 7: Remove the check mark from the check-box labelled Hide extensions for known file types.
Step 8: Remove the check mark from the check-box labelled Hide protected operating system files (Recommended).
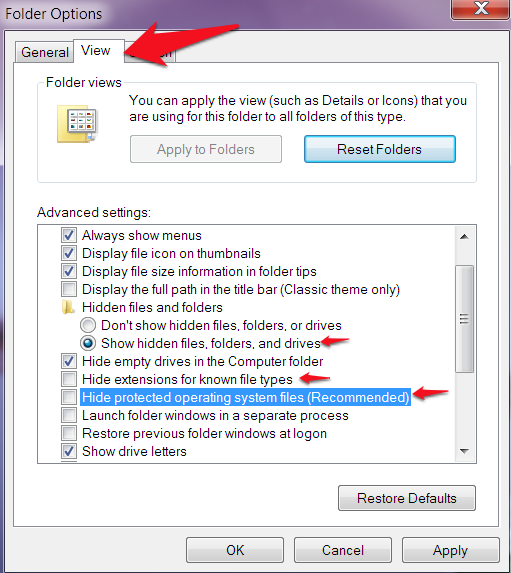
Step 9: Press the Apply button and then the OK button.
If you have any questions about this tutorial please feel free to post them below.


0 Yorumlar